
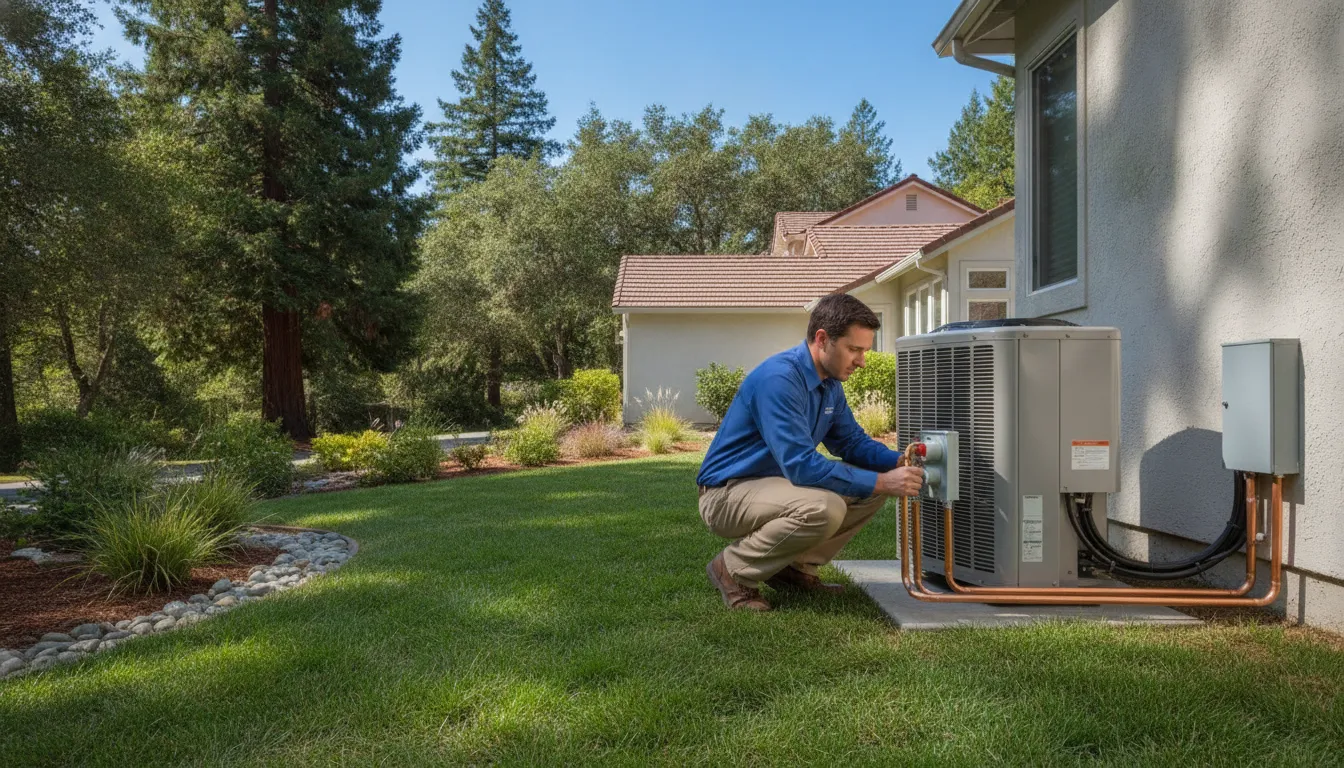
Planning a new cooling system can feel like a large decision, especially when you are not sure what happens after you request a quote. Air conditioner and installation is more than placing a new outdoor unit beside the house. A professional installation connects equipment selection, home sizing, ductwork, electrical requirements, refrigerant lines, drainage, controls, testing, and homeowner instruction into one coordinated project. Knowing the major stages helps you ask better questions, prepare your home, and compare proposals based on lasting comfort rather than a single equipment number.
Call Airteks at (510) 719-0621 for a residential AC installation quote.
Why air conditioner and installation starts with the home
Two houses with the same square footage may need different cooling solutions. Window orientation, insulation, ceiling height, duct design, occupancy, air leakage, existing electrical service, and the amount of shade all affect how a system should perform. A reliable contractor evaluates those conditions instead of choosing equipment from square footage alone.
The first visit should connect your comfort concerns to measurable conditions. Tell the technician which rooms run hot, whether humidity is a concern, how often the existing system cycles, and whether your utility bills or repair history have changed. If you are replacing an older unit, share its age, model information, maintenance history, and any recurring symptoms. Those details help the contractor determine whether a straightforward replacement, ductwork correction, zoning improvement, or a different system configuration makes more sense.
Airteks’ residential AC installation is a useful next step when you want to discuss the home-specific factors behind a recommendation. A site evaluation should leave you with a clear explanation of the proposed equipment, installation scope, assumptions, and follow-up responsibilities. You can also review the residential HVAC installation service to see how a complete home system project is approached.
Step 1: Assess the home and define comfort goals
A quality installation begins before anyone removes the old equipment. The technician should review the location of the indoor and outdoor components, the condition and routing of refrigerant lines, the return and supply ductwork, the electrical disconnect, condensate drainage, thermostat wiring, and available service clearances. The evaluation can also identify obstacles such as limited attic access, a crowded side yard, a roof or platform requirement, or a condensate line that needs a safer route.
Homeowners should describe the result they want, not only the equipment they have seen advertised. You may want more even temperatures between floors, quieter operation in bedrooms, better airflow in a back room, lower summer energy use, or simpler thermostat control. If the house has persistent hot or cold spots, replacing the outdoor condenser without reviewing airflow may not solve the underlying problem.
Ask whether the proposal includes a load calculation or another documented sizing method. ENERGY STAR’s quality-installation guidance explains why right-sized equipment, optimized airflow, correct refrigerant charge, and evaluated ducts matter. Oversized equipment can cycle too frequently, while undersized equipment may run for long periods without maintaining comfort.
Step 2: Choose the right air-conditioning configuration
Once the home and goals are understood, the contractor can discuss equipment options. A conventional split central air conditioner is a common choice when the home already has compatible ductwork and a suitable furnace or air handler. A heat pump can provide cooling and heating from one system, which may be useful for homeowners considering broader equipment changes. Ductless systems can serve additions, converted spaces, or rooms where extending ducts would be difficult. The best option depends on the home, not on a generic ranking of system types.
Equipment selection also includes capacity, efficiency, sound expectations, control compatibility, cabinet dimensions, and service access. Higher efficiency may involve a higher initial investment, but a system that is correctly sized and installed can provide better performance than a higher-rated model that is poorly matched to the home. Discuss the expected operating conditions in your area, the equipment’s matched indoor and outdoor components, warranty terms, and the maintenance needed to protect performance.
Be cautious when a quote lists only a brand and a tonnage. A complete proposal should identify the equipment model numbers or a sufficiently detailed specification, what work is included, the assumptions about existing components, and any recommended improvements that are not part of the base price. This makes proposals easier to compare and reduces the chance of surprises when installation begins.
Step 3: Review ducts, airflow, electrical work, and drainage
The new air conditioner depends on the systems around it. Ducts that are disconnected, undersized, poorly insulated, or leaking can limit comfort even when the condenser and air handler are new. The contractor may recommend sealing accessible joints, correcting a return-air restriction, repairing insulation, balancing registers, or replacing sections that cannot support the intended airflow. These recommendations should be explained in terms of comfort, safety, performance, and cost.
Electrical requirements also deserve a clear explanation. The technician should verify that the circuit, disconnect, wiring, grounding, and overcurrent protection are appropriate for the selected equipment. Do not assume that the electrical setup for the old unit automatically meets the requirements of the new one. Any needed electrical work should be listed in the proposal and completed by the appropriately qualified professional.
Condensate management is another practical part of the installation. Cooling equipment removes moisture from the air, so the drain route, trap, pan, float switch, and termination point need to be considered. A sound design helps reduce the risk of water damage and makes future maintenance easier. Ask where the primary drain goes, whether a secondary safety measure is included, and how you can recognize a drainage problem.
Step 4: Plan permits, scheduling, and protection for the home
Permits and inspections vary by jurisdiction and project scope. Your contractor should explain who handles any required permit, whether an inspection is expected, and how that affects the schedule. Permitting is not just paperwork. It provides a way to document that the work meets applicable requirements and that major components are installed in an acceptable manner.
Before the crew arrives, clear a path to the indoor unit, attic access, electrical panel, thermostat, and outdoor condenser location. Secure pets, move fragile items, and tell the contractor about alarm systems, gates, parking limits, or working-hour restrictions. If the project involves an attic, discuss where technicians will place tools and how the crew will protect flooring and finished surfaces.
A professional crew should protect the work area, contain removed materials, and clean up at the end of each stage. Ask how the old equipment and refrigerant will be handled, whether the proposal includes disposal, and what happens if hidden damage appears after removal. A written process for changes is better than an unexpected verbal charge at the end of the day.
Step 5: Remove the old system and install the new equipment
On installation day, the crew typically confirms the scope, protects the work area, and isolates the equipment before removal. Existing refrigerant must be recovered using the proper equipment rather than released. After removal, the technician can inspect the pad, platform, line set, connections, duct transitions, drain route, and electrical components that will be reused or replaced.
Installation then involves setting the outdoor condenser level and with appropriate clearance, positioning the indoor coil or air handler, connecting refrigerant lines, completing duct transitions, wiring controls, and establishing the condensate drain. Small details matter. The line set should be protected and connected correctly. Duct connections should be sealed. The equipment should have room for service. The thermostat should be placed where it can sense the home rather than a direct heat source.
If the project includes a new furnace, air handler, heat pump, thermostat, or ductwork sections, the crew should coordinate those components as one system. A new condenser cannot compensate for a restricted filter rack or a poorly connected return. That is why the installation scope should describe the complete system rather than only the most visible outdoor component.
Step 6: Test, commission, and explain the system
Commissioning is the stage that turns an assembled system into a tested system. The technician should verify electrical readings, airflow, temperature change, refrigerant charge according to manufacturer requirements, thermostat operation, condensate drainage, safety controls, and the system’s response in cooling mode. The outdoor unit should be checked for abnormal noise or vibration, and the indoor airflow should be evaluated at the registers.
Ask for a homeowner handoff before the crew leaves. You should know how to change the filter, set the thermostat, access the disconnect, identify the primary drain, and schedule maintenance. Keep the model and serial numbers, warranty information, permit or inspection documentation when applicable, and the contractor’s contact details. Ask what the labor warranty covers and what maintenance is required to keep equipment coverage in effect.
Do not judge a new installation only by whether cold air comes from a register. A system may cool initially while still having airflow, drainage, control, or charge problems that affect efficiency and reliability. A careful startup and a clear explanation give you a better baseline for future service.
Air conditioner and installation options compared
The following comparison can help organize an initial conversation. It is not a substitute for a site evaluation because existing ductwork, electrical capacity, heating needs, and room layout can change the recommendation.
| Configuration | May fit when | Questions to ask |
|---|---|---|
| Central split air conditioner | The home has compatible ducts and a separate furnace or air handler. | Are the ducts sized, sealed, and accessible for testing? Is the indoor coil matched to the condenser? |
| Heat pump | You want cooling and heating from one electrically powered system and the home supports the change. | What supplemental heat, controls, and cold-weather operating expectations apply? |
| Ductless mini-split | An addition, converted room, or area lacks practical ductwork. | How many zones are needed, where will indoor heads go, and how will condensate and outdoor access be handled? |
| Central system with duct improvements | The existing equipment is being replaced but airflow or leakage problems are known. | Which duct repairs are included, and how will the contractor verify improved airflow? |
How to compare an air conditioner installation quote
The lowest number is not always the lowest total cost. Compare each proposal line by line so you can see whether it includes equipment, labor, permits, removal, disposal, electrical changes, duct repairs, startup testing, thermostat work, warranty coverage, and cleanup. If one quote is much lower, ask which part of the scope differs instead of assuming the contractor found a better deal.
Use the contractor’s explanation to understand what is included in the price and what is an optional improvement. Airteks’ guide to what an HVAC quote should include can help you organize those questions. You can also review the factors in the cost to install a new air conditioner guide, including home size, system type, ductwork, efficiency, and local project conditions.
When comparing contractors, confirm licensing and insurance, experience with the proposed equipment, communication expectations, service availability, and the process for warranty calls. Ask who will perform the work, whether subcontractors are involved, and who is responsible for the final startup and homeowner orientation. A detailed quote should make the contractor’s responsibilities easy to understand.
How homeowners can prepare for a smoother installation
- Write down rooms with uneven temperatures, unusual noises, odors, or repeated repair problems.
- Take photos of the indoor unit, outdoor condenser, thermostat, electrical disconnect, and visible ductwork before the quote.
- Locate model and serial labels if they are accessible without removing panels or entering unsafe areas.
- Ask whether the existing line set, pad, drain, filter rack, and thermostat will be reused or replaced.
- Request equipment details and a written scope that identifies exclusions and possible change-order conditions.
- Plan for a temporary interruption of cooling and make arrangements for children, pets, or anyone sensitive to heat.
- Keep the filter size, warranty information, and startup documentation where you can find them after the project.
Homeowners should not open refrigerant circuits, alter electrical connections, disconnect gas components, or attempt to lift equipment. Those tasks require specialized tools, training, and safety procedures. Your role is to provide accurate information, ask questions, protect access to the work area, and verify that the handoff is complete.
Air conditioner installation for Northern California homes
Airteks serves homeowners across Northern California, including Livermore, Pleasanton, Walnut Creek, Sacramento, and communities in Alameda, Contra Costa, San Joaquin, Santa Clara, and Napa counties. Local conditions can shape an installation conversation. A home in the inland East Bay or Central Valley may face long, hot cooling periods, while a property closer to the Bay may have different evening temperatures, marine influence, or comfort priorities. The right system still starts with the individual home and its airflow needs.
Homeowners in Sacramento, Elk Grove, Stockton, and nearby communities may be especially focused on capacity, runtime, and keeping bedrooms comfortable during extended heat. In Livermore, Pleasanton, Walnut Creek, and other Bay Area locations, the contractor may need to account for a mix of hot afternoons, cooler nights, older housing stock, and varied duct layouts. These are reasons to request a site-specific evaluation rather than selecting a system from a generalized online estimate.
For a broader overview of the service, visit Airteks’ residential HVAC installation page. If your existing equipment is failing but you are unsure whether replacement is necessary, the air conditioner replacement guide can help you organize the signs and questions to discuss with a professional.
Call Airteks at (510) 719-0621 to discuss your air conditioner and installation options.
Frequently Asked Questions About Air Conditioner and Installation
How long does air conditioner installation take?
The schedule depends on the system type, access, permit requirements, duct or electrical work, and whether old equipment must be removed. A straightforward replacement may be completed in a day, while a more involved project can take longer. Ask for a realistic schedule based on the actual scope. Airteks’ guide to how long HVAC installation takes covers the factors that can change the timeline.
Should ducts be replaced when installing a new air conditioner?
Not always. Ducts that are appropriately sized, accessible, well connected, and in good condition may be reusable. Ducts with major leaks, damage, poor insulation, restrictions, or an incompatible design may need sealing, repair, resizing, or replacement. The important question is whether the duct system can deliver the airflow the new equipment requires.
What should be included in a professional installation quote?
A detailed quote should identify the proposed equipment, labor, removal and disposal, permits when applicable, electrical or duct changes, thermostat work, startup testing, warranty terms, and cleanup. It should also state exclusions and explain how unforeseen conditions will be handled. Request clarification before signing if a major part of the installation is described only as an allowance or optional item.
Can a new air conditioner lower energy use?
It can, particularly when old equipment is inefficient or unreliable, but savings depend on sizing, controls, duct condition, insulation, thermostat settings, maintenance, and how the home is used. Correct installation is as important as the equipment rating. A contractor should explain expected performance without promising a specific bill reduction that cannot be verified in advance.
What should I do after the installation is complete?
Confirm that the system cools the home, the thermostat responds correctly, drains operate as expected, and unusual noise or vibration is not present. Learn the filter location and replacement schedule, keep your documentation, and ask when maintenance should be scheduled. Contact the installer promptly if you notice water, repeated short cycling, weak airflow, or a persistent performance problem.
Plan your air conditioner installation with a clear quote
A successful project matches the equipment to the home, prepares the supporting systems, protects the property, and verifies performance before the crew leaves. If you are comparing options or preparing for a replacement, Airteks can evaluate your home and explain the installation path in practical terms.
Call Airteks at (510) 719-0621 to request a professional installation quote.
Comments